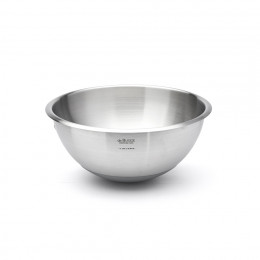
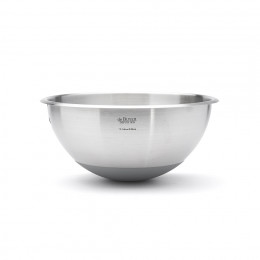
Vanilla, Apricot, and Honey Entremets

n

Vanilla, Apricot, and Honey Entremets

For 8-10 people

Difficulty : medium

Price : medium

Ingredients

For the apricot-honey insert

  • 400 g of fresh or frozen apricots
  • 50 g of acacia honey
  • 1 tbsp of lemon juice
  • 4 g of gelatin (2 sheets)

For the honey financier

  • 65 g of butter
  • 65 g of powdered sugar
  • 35 g of almond flour
  • 30 g of flour
  • 3 egg whites
  • 25 g of honey

For the vanilla mousse

  • 160 g of whole milk
  • 1 vanilla bean
  • 4 egg yolks
  • 60 g of sugar
  • 7 g of gelatin (3 ½ sheets)
  • 350 ml of cold heavy cream (30% fat)

For the neutral glaze

  • 150 g of water
  • 150 g of sugar
  • 2 sheets of gelatin

Preparation of the apricot-honey insert

To be prepared the day before

Soak the gelatin in cold water.

In a saucepan, cook the apricots with the honey and lemon juice for 10 to 15 minutes.

Blend finely, then stir in the drained gelatin into the still warm compote.

Pour into an 18 cm ring, let cool, then place in the freezer overnight.

Preparation of the honey financier

To be prepared the day before

In a saucepan, melt your butter with your honey. Set aside.

In a mixing bowl, combine the powdered sugar, almond flour, and flour.

Add your egg whites and mix.

Finish by pouring in your butter/honey mixture and stir until you get a smooth mixture.

Pour the mixture into your ring mold and bake for about 15 minutes at 180°C (356°F).

Preparation of the vanilla mousse

To be prepared the day before

Rehydrate the gelatin.

Bring the milk to a boil with the split and scraped vanilla bean.

Whisk the egg yolks with the sugar until pale. Pour the hot milk over the mixture while whisking.

Pour it back into the saucepan and thicken it like a custard.

Add the gelatin off the heat. Let it cool slightly.

Whip the cream until soft peaks form, then gently fold it into the vanilla cream.

Assembly

To be prepared the day before

In a 20 cm ring mold, pour half of the vanilla mousse.

Place the apricot-honey insert centered on top.

Cover with the remaining mousse, then finish with the soft honey biscuit on top.

Smooth if needed and freeze for at least 6 hours (ideally overnight).

Finishing touches

On the big day

Unmold the entremets while still frozen, then pour your warmed glaze over it.

Decoration: apricot slices

Expandable graduated ring ø 18 to 36 cm

TIPS

Tool tip: The adjustable stainless steel ring is an essential tool for baking with precision and flexibility:

  • One ring, multiple sizes: Thanks to its extendable system, it easily adapts to all your recipes and the number of guests. No need to multiply fixed rings—you adjust the size in a flash according to your needs.
  • Space saver guaranteed: When collapsed to its minimum, it fits easily in a drawer, perfect for kitchens with limited space. You can also adjust the ring slightly larger than another round object (like a basin or mold) to place it around and save space.
  • Place and line the ring with a strip of parchment paper or polypropylene between the ring and the preparation to ease unmolding and get a clean finish—ideal for mousses.
  • Or run the blade of a warm knife or slightly heat the ring with a torch before unmolding.

Recipe Tip:

  • Prepare your insert in advance: You can make your insert several days ahead and keep it frozen. This helps you spread out the recipe steps without stress and ensures better stability during assembly.
  • Ideal temperature for whipped cream: When folding the whipped cream into the vanilla and gelatin mixture, make sure it’s around 30-35°C. If it’s too warm, it will melt the cream; if too cold, the mousse might become lumpy.
  • Plan ahead for the entremets: Prepare it the day before, or even two days in advance. It keeps very well in the freezer, and you just need to take it out a few hours before serving for a perfect result.
  • Respect the dimensions for an aesthetic finish: Your insert should be about 2 cm smaller than your main ring for a nice visual effect.

A recipe by : 

Amel, Ma Vie Caramel

My name is Amel, better known on Instagram as Ma Vie Caramel.

I’ve been passionate about pastry since 2017, the year I created my Instagram account and a few years later, my blog www.maviecaramel.fr.

I love sharing my passion with enthusiasm and authenticity through photography and video.

0 Liked Share:
Related posts